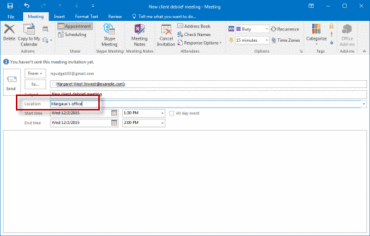
A meeting is an appointment that includes other people. If you know how to set up an appointment, the steps are similar to set up a meeting. Responses to your meeting requests appear in your Inbox.
1. Go into the Calendar option and on the Home tab, in the New group,
click New Meeting.
2. Add attendees on the To line.
3. Type a brief description in the Subject field.
4. Type a location in the Location field. 5. In the Start time and End time area, use the drop down arrows to click the appropriate day and times for the meeting.
If you select the All day event check box, the event shows as a full 24-hour event.
6. Type any information that you want to share with the recipients in the meeting request message area.
• To attach a file to be sent with the request, click the Insert tab and in the Include group, click Attach File. Locate the item and double-click it; the file icon and name will appear in the body area.
• Optional: If attendees keep their Outlook calendar current, on the Meeting tab, in the Show group, click Scheduling Assistant. The Scheduling Assistant helps you find the best time for your meeting, since attendees schedules appear. The free/busy grid shows the availability of attendees. A green vertical line represents the start of the meeting; a red vertical line represents the end of the meeting.
7. Once everything is complete, click Send (as with an email).
Recipients will receive the invitation and respond accordingly. As each person responds, you will receive an email with his/her availability.
To check responses, go to the calendar and double-click on the meeting. The request will appear showing those invited and total responses in the lower part. To see each person’s name and his/her response, on the Home tab, in the Show group, click Tracking.


